

Brent DuPont’s 1955 Chevrolet 210 "Nickelback"
- scheurenmichael

- Jun 30, 2025
- 6 min read

I have built 4 cars in my time now. First car I owned was a 68 Camaro SS Big Block. That was the one that got away – and I miss the most. But it served its purpose. I sold it and was able to put a down payment on my first house, preparing to start a family. That was in 1996.
Fast forward 7 years, I just finished a 57 Bel Air Hardtop called “Ricochet”. This build took almost 7 years to complete in my garage. It was more of a Street Rod style “Gentleman’s” car if you will. This was the first car I really got into fabrication and metalwork. I learned a great deal from that car and blessed to have received many accolades. I ended up selling that car at SEMA 2003 to a gentleman, Ray Skillman.
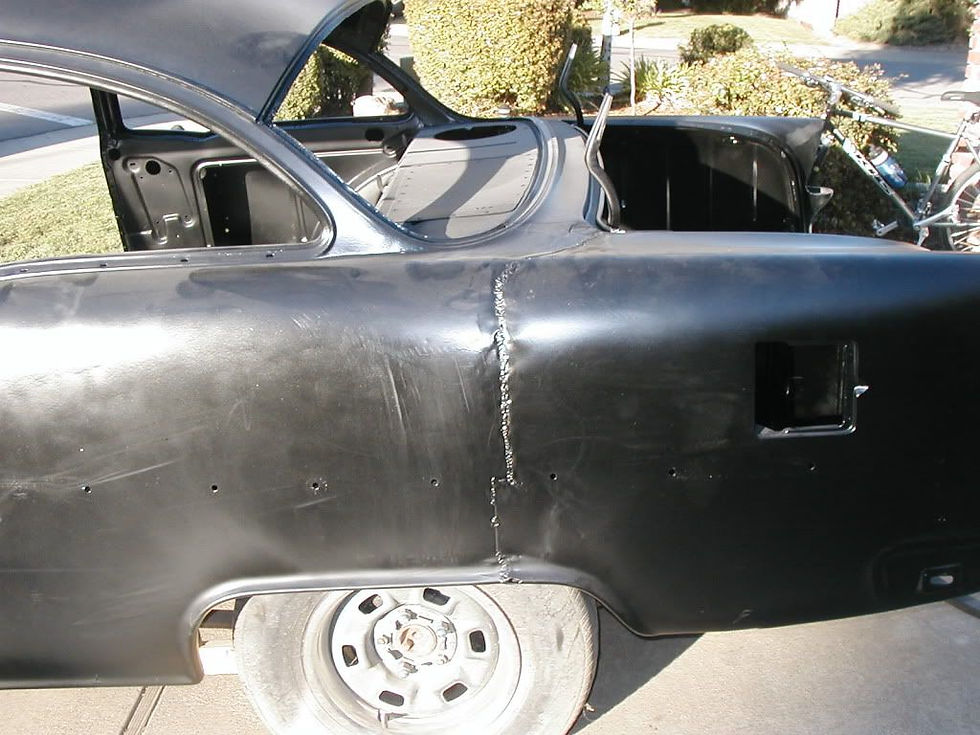
I have always been a fan of the 55 Chevrolet, especially the 210 post model. From the likes of American Graffiti, 2 Lane Black Top and Scott Sullivan’s Cheez Whiz, it is in my opinion, the “Hot Rod” of the Tri-Five era. I started searching around for a solid “victim”. Turned out a coworker said he had a project 55 that he would be willing to sell. It was a just roller. No motor/trans, glass etc. But it came with all the trim, bumpers etc. I checked out the car and it was extremely solid. With a purchase price of $4,000, I loaded it up and brought it home. This was February 7, 2004.


With this build I wanted it to be more on the edgy side. I have a very good friend, Michael Desmond, that did some renderings for me. He is an amazing designer and has worked with many builders over the years. I gave him an idea of the direction I wanted to go, and he ran with it. He took things to completely different level and provided ideas on the motor compartment, trunk, bumper treatment, interior etc. Mind you – I’m just an average Joe doing this in his garage. I did what I could do within my skillset and budget. I started by reaching out to Jim Meyers Racing to build a chassis. Originally, we were thinking of doing a full round tube chassis. After careful consideration, we decided to use 2X4 rails, that we had Morrison bend up for us, and used round tubing for cross members to tie it all together.


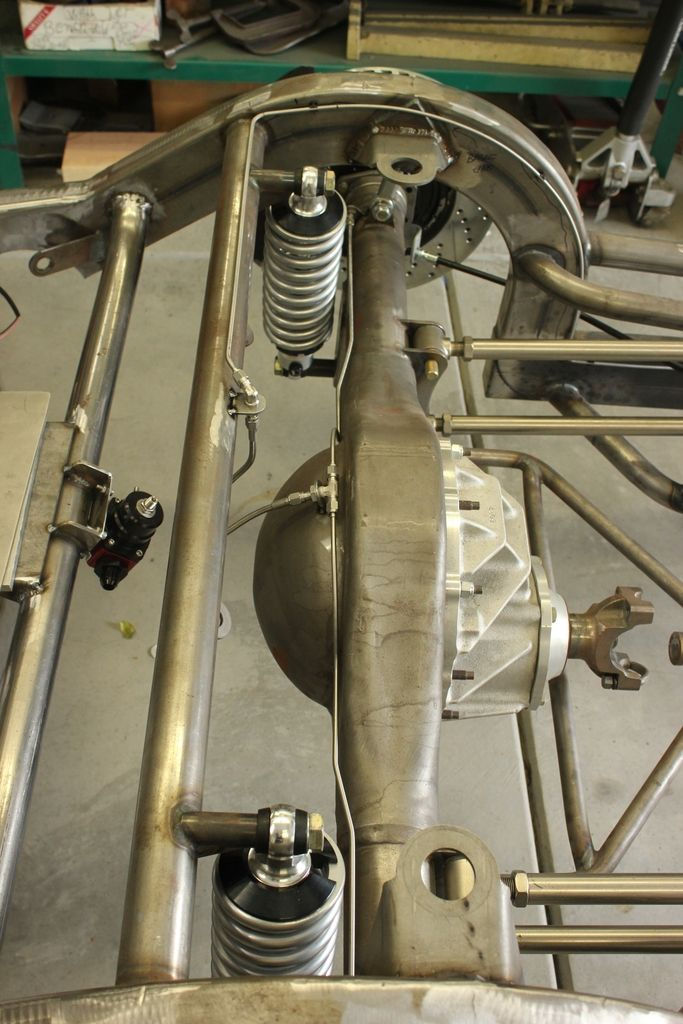


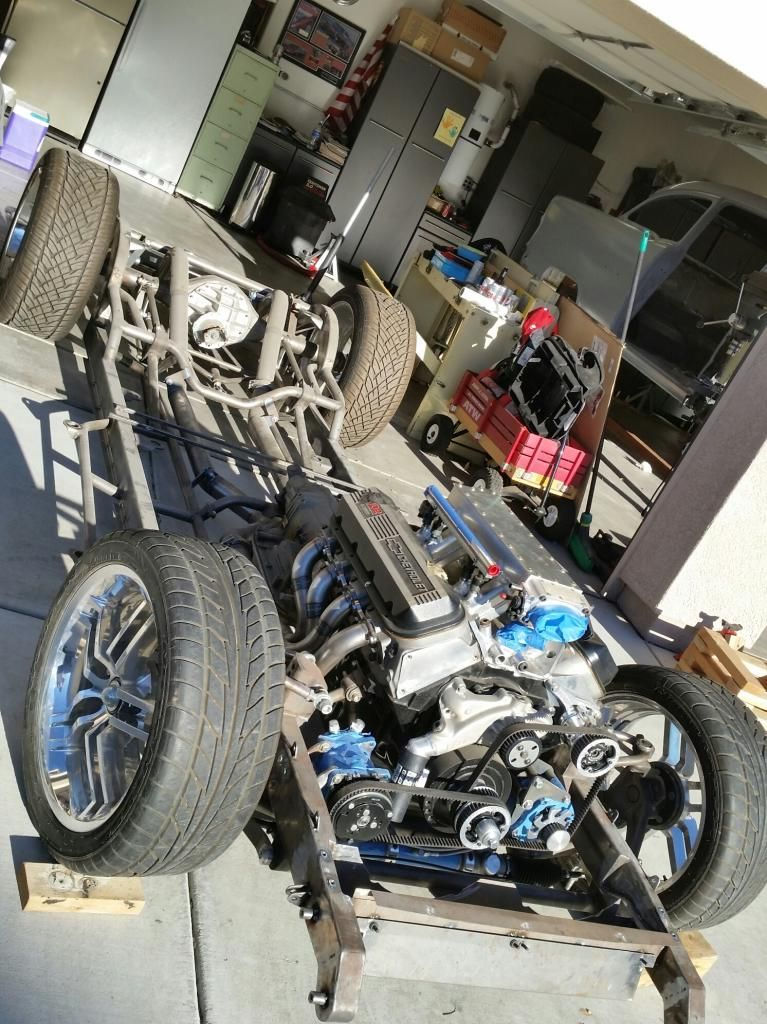


We worked hard to get the car to sit low, be functional and most importantly – nothing to hang below the frame rails. Front suspension consists of round tube upper and lower control arms, drop spindles, Flaming River Power Rack, and 1 1/8” splined sway bar. The rear consists of a 4-link set up with swivel link ends, wish bone locater and 7/8” splined sway bar attached to a Ford 9” with a Strange Aluminum Center and 4.00 gears. QA1 Coil Overs reside at all 4 corners. Hiding behind the Forged 3 piece wheels are 14” Baer 6P brakes with 18x8 w/ 245/40’s up front and 20x11 w/ 315/35’s in the rear.
Knowing I was going to do a fair amount of metal work on this car, I bought a brake, a shear and a bead roller. This for me was probably the biggest undertaking for me. Lots of trial and error. With that said though, I made my own floors, trunk pan, wheels tubs, and tunnel. I modified a universal firewall that I bought, that worked out perfect. I then moved onto the motor compartment. It was originally designed to have an engine cover, which were really in back in the day when I embarked on this project. In keeping up with the times, I decided to forego the cover, which I still have in my attic collecting dust!


Speaking of the motor. The motor started life as a crate 502 short block. It has been topped off with a pair of Pro Topline Heads, 9.5:1, Isky Hydraulic Roller Cam, Hogan Sheet Metal Intake, EFI and a 1100 CFM throttle body. I used a Big Stuff 3 Powertrain Management System to handle the drivetrain. Made 638 HP and 611 ft lbs. torque. All this backed by a 4L80E and Pro Torque Converter.


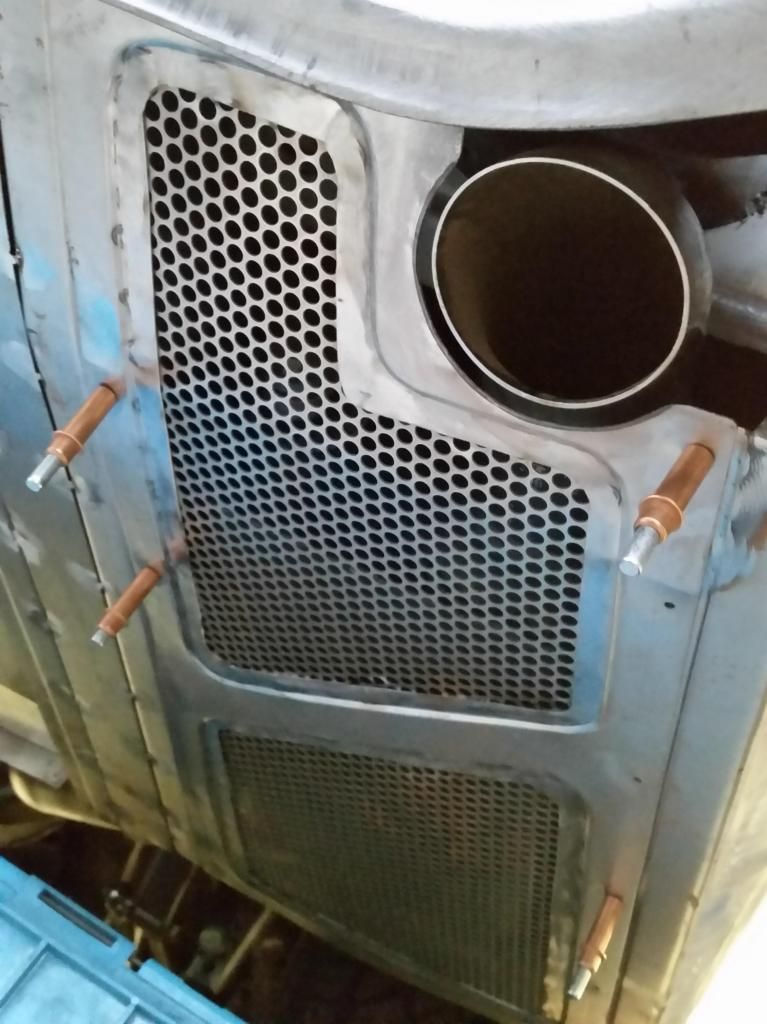
One of the things I really wanted to clean up on this car was the area from the pinch weld to the frame rail. I made panels that run full length of the car that tie at the front inner wheel wells to the rear tubs. I also made a rear belly pan that runs full length across the back. The mufflers sit behind the rear tires between the frame rail and body.


Once I had the fabrication done, I sent the car to my good friend Jim Ramirez to work his magic on the body and paint. Aside from having to replace the driver side rear quarter, the rest of the car was very solid overall. Only modifications we did was extend the fender line into the door 17”, smooth the hood, trunk, cowl panel eliminating the wipers and weld up the lower fender extensions. Jim spent countless hours getting the gaps and body straight. I owe a great deal of gratitude to him. And before I forget – he also did all of this in his 2 car garage! One thing to note. The name of the car “Nickelback”. Originally, the car was going to be 2 tone. Burgundy and Nickel – hence the name Nickelback. As we got closer to paint, the decision was made to do it all one color. A decision I’m very happy with! The name just stuck – plus I do like the band! The color is off a 2008 Porsche – called Carmon Red Metallic.


Once I got the car back, it was assembly time. I started by using DEI sound deadening through the car. My youngest son, Joey, laid boom mat throughout the car including the floors, doors, trunk and roof. Once that was done, I started the wiring. I used an American Auto Wire Hwy 22. With all the extra’s real estate gets gobbled up quickly under the dash – so I mounted the wiring panel I the trunk. From the Vintage Air System, Big Stuff 3 Management System, Dakota Digital gauges and modules, Spal Fans, PDL, PW and stereo system it took quite a while to get everything ran nice, tight and loomed.


One thing I have done on my builds is keep the body mods to bare minimum and utilize the factory trim. I figured GM paid those engineers and designers a lot of money on these cars – why mess with it? Just keeps the car timeless in my opinion. With that said, I utilized all the original 210 trim. The bumpers are factory originals. Although, they have been welded up and made them one piece and narrowed them slightly for a tighter fit and eliminated the bumper bolts. Once that was done, Sherm’s Plating in Sacramento worked their magic to finish them as well as polish the stainless trim.


It was finally ready for interior, so it went off to Dave Putnam for his expertise. The only thing I did prior was eliminate the passenger side hump on the dash and fit the Dakota Digital gauges. I gave him some ideas of what I like and didn’t like. The rest was on him. Aside from the front seats, which are highly modified Recaro’s. the rest of it was all custom built by Dave. He did an
amazing job designing and executing everything. In his designed he engineers everything so things can be accessed and serviced easily if need be. One thing I like is my music – so having a nice system was not a question. I started with a Sony Head Unit and used a couple of Diamond Audio amps pushing 2 sets of Diamond Audio HEX 600A series components and 2 Diamond Audio 10” subwoofers. All controlled with a Rockford Fosgate Processor.


I was blessed to be asked to debut the car at SEMA 2024 in the Mothers Polish Booth. The level of cars at that show is nothing short of incredible. So, for an average guy who built this car in his garage, hanging out with that kind of clientele was such an honor. Something myself, and my family, will remember for the rest of our lives. Since SEMA, we have been some local car shows and the feedback we have received thus far has been overwhelming. To say I’m blessed and beyond grateful is severely understated. I do this to fuel my own fire I have for this hobby. With that said I can’t thank everybody for the support, not only during the build, but for the reception of the final product.


One thing I’m most proud of, is I never swayed from my original vision. There were times the car sat more than it got worked on, due to family and life’s priorities. But after 20 years of perseverance and dedication, I finally finished it. There is no way I could have done this without the support and understanding of my wife Diane and my boys James & Joey.

Additional photos of the project including finished photos!


A special Thank You to Brent DuPont for one of the Ultimate "From Your Garage" submissions! His 55 Chevy "Nickelback" is proof that with a vision, a ton of time and patience and the will to never give up can result in the car of your dreams!
Want your car featured here? Just submit the build story, experiences and any photos you want published to me at: streetmachinecentral@gmail.com
All photos and text by Brent DuPont


Comments